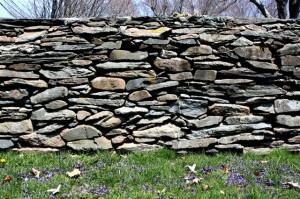
I’m frequently asked for advice on how to build a stone wall. I can’t give you personal advice because I’m frankly not that good at it. But there’s plenty of training workshops out there to learn from, a few of which I list below. And below that on the page are some simple how-to books, and a set of ultra-simple instructions, courtesy of Carl Dill.
STONE WALL WORKSHOPS
Though I do not endorse any of these, all are reputable sources of information.
- Freeport Historical Society – Maine
- Queen City Soil and Stone – Vermont
- Stonewell – Andrew Pighills – Connecticut
- Newport Restoration Society – Rhode Island
- The Stone Trust – Vermont
- Dan Snow Stoneworks – Vermont
HOW-TO-BOOKS
- 1965 – The Forgotten Art of Building a Stone Wall, by Curtis Fields, Yankee Magazine. This old standby, written by an amateur turned mason in retirement, is hard to find. It’s well worth the trouble to find, if only to appreciate how long this enterprise has been going on.
- 1976 – Building Stone Walls, by John Vivian, Garden Way Publishing, Pownal, Vermont. As straightforward as its title, this book is the standby, a no-nonsense primer, a simple how-to book. This is widely available.
- 1999 – Building Stone Walls (Excerpted from Stonework, by charles McRaven): A Storey Country Wisdom Bulletin; A-217.( ISBN -10: 1-58017-265-2), Storey Publishing LLC. This is inexpensive and very clear.
- 2001 – The Granite Kiss, by Kevin Gardner, Countryman Press, Norton Publishing. This is the one for those of you wished you had been born into a stonemason family, as was Kevin’s case.
BOILED DOWN INSTRUCTIONS
At one of my talks, I encountered an unpublished pamphlet that provides most of what anyone would need to know to build a simple wall by themself. Its author, Carl Dill of New Milford CT, who worked in the building supply business. He told me the pamphlet originated as a series of notes he handed out to students of stone-wall workshops, taught through Western Connectiicut State University. With his permission (May, 2006), I reproduce a slightly edited version of his original text. It’s enough for a head start.
Safety First
Wall building can causes serious injuries if precautions are not taken. Be sure to wear hard toe boots, eye protection, easily removable leather-palmed gloves and a lifting belt when heavy stones are being moved. The gloves are for moving and lifting stones and are removed when placing light weight stones and “chinkers” between stones to keep them from rocking.
Tools
Use a brick hammer to knock off an edge and set stones solidly into place by tapping them firmly. A 4 lb. stone hammer is used to break larger stones. A stone chisel is used to split the stones to create flat surfaces and to remove bumps. As many as six different chisels can be used, however my experience is that one good one does it all. The best chisels have a strong rubber protective shield at the top so you won’t smash your fingers when you miss the head of the chisel. Other necessary tools are a shovel, garden rake or hoe, mason line, line level and stakes of various lengths depending on the height of the wall. If you will be digging up stones you’ll need a crowbar.
Supplies
Wall stones, washed gravel and patio-paver sand also known as “stone dust.”
To Begin
Decide where the wall is to go and use mason line held in place by short stakes to outline the width and length of the wall. Dig out the area of the wall about three inches deep removing stones and roots. Save small stones in a bucket with bottom drain holes for use later. A wall laid on frozen ground is likely to fail when the ground thaws and the stones settle unevenly. Unless a footing is 42” deep, there will be movement so digging deeper than three inches is unnecessary. Spread about 2” of gravel in the trench. This provides some drainage and makes positioning large base stones easier.
Stones
The most attractive walls are built with a variety of sizes and shapes of stone. Separate them into four different areas. The first are the largest of all which are laid at the bottom with the most desirable face showing. Rearrange the gravel to accommodate any odd configurations on the bottom so the stones set solidly in the trench and tightly side by side. Second are the face stones with the desirable edge that will show as the wall is built. Third are the fill stones that will be inside the wall and fourth are the top and end stones that you should hide until you are ready to use them. It’s tempting to use these stones as you build the wall up because they are so easy to use. Top stones should be large and flat for best appearance.
Building
For this discussion you are building a wall with two sides showing. Not a retaining wall which is built somewhat differently. Our wall is basically two walls back to back, slanting slightly toward each other, the inside filled with the stones that don’t qualify for bases, faces, tops or ends. A standard slant or “batter,” is 1” for each 12” of height. This uses gravity to insure the wall is only going to get tighter as frost heaves the wall upwards. Another critical building tip is to be sure that the top of every face and end stone tips slightly inward. You can be sure that no matter how tight a stone is fitted, if it sits on top of another stone that slants down to the outside, that upper stone will eventually fall out and the wall will be compromised.
The Cardinal Rule
It’s referred to as “1 over 2 and 2 over 1” which means that any face, end or top stone must cover the joint of the stones below it. This eliminates vertical seams. A vertical seam between stones creates great weakness in the wall.
Strategy
Build your wall up at one end as you build the middle upwards and set base stones toward the other end. Drive stakes about 6’ apart along the outline of the wall. Connect them with mason line at the proposed height of the wall and attach a line level that will keep the wall level at the top and help follow the plan of the wall without bump-outs. For a high wall you may need to move the mason line up as the wall is built. To keep a perfect batter you may want to build an “L-shaped” contraption of wood, however most walls are built without one simply using the eyeball method. Professional wall builders try never to handle a stone twice and you will seldom have to pick one up and put it back down again if you have a number of available places to set it. You may have heard stories about a wall builder so talented that he [or she] could just look at a stone once, pick it up, chip a bit off and then drop it with a “kerchunk” perfectly in place. Don’t believe it! That will happen once in a great while and when it happens to you, celebrate with a whoop and a little dance…and a cold beer if you don’t plan on going back to work with heavy stones, flying stone chips and steel hammers and chisels.
Finishing
Using those large flat stones you hid away at the beginning, arranging them with as tight seams as possible filling voids with smaller stones. Then put stone dust in small amounts over the seams and brush it in. pack the stone dust down. After the first rain go back and refill since some of the stone dust will have settled into the wall. This finishing step prevents leaves, seeds and other debris from getting into the wall and eventually forming soil where trees and brush will grow, their roots forcing the stones apart and collapsing the wall.
Congratulations
You’ve built a wall that should last for centuries and which you can point to with pride. If you’ve caught the wall bug you already know where your next wall project will be. You’ve got some stones left over and your tools are ready. This second wall…will it have steps, be wider, longer, hae projections for planters, enclose a raise garden? The possibilities are endless.
